What is Google Tag Manager?
Google Tag Manager is a tag management system that allows you to add snippets of code (tags) to your website without manually editing the code within the website structure itself. It is particularly useful for marketers working with SEO or PPC, who need to track and measure more than standard reports can provide. The data that you can access by deploying tags can be crucial in growing your business and for getting valuable insights into how your audience interacts with your brand online.
How to set up Google Tag Manager
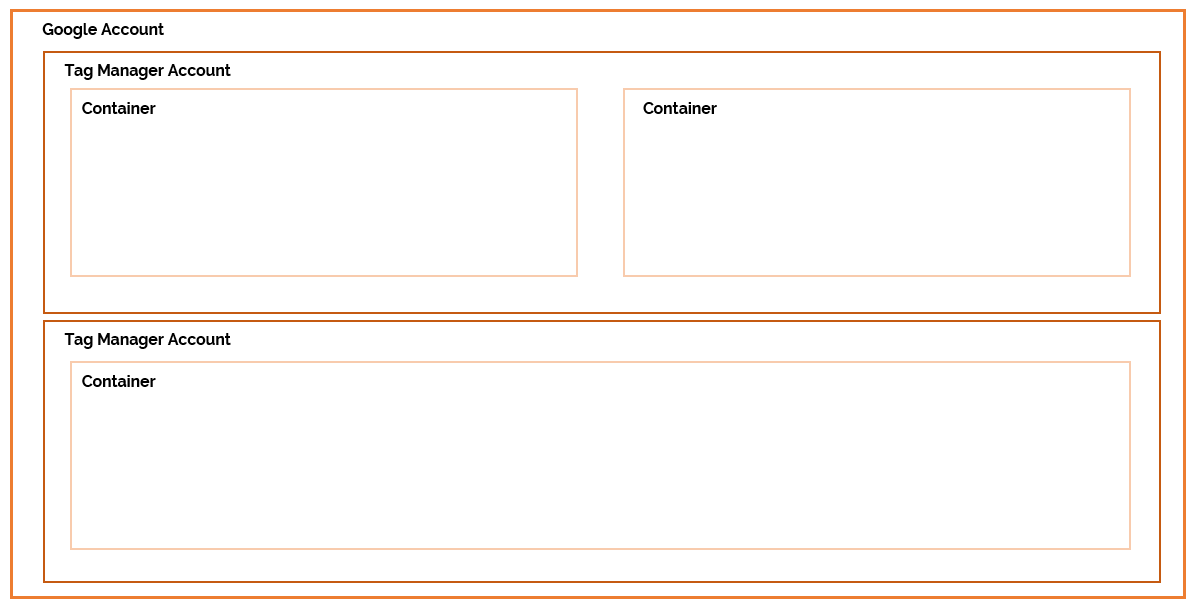
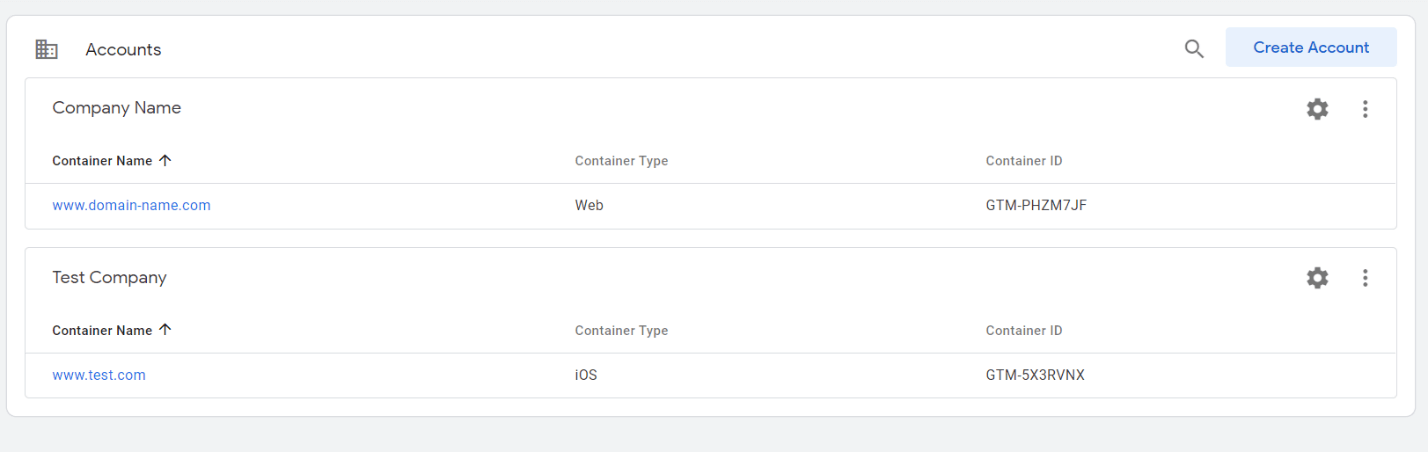
You can access Google Tag Manager (GTM) from your Google Account. Within GTM you will then have an account with one or more containers. You can access multiple GTM accounts from one Google Account. You can also grant GTM account access to other Google Accounts, or be granted access to an existing account that has been set up by another user.
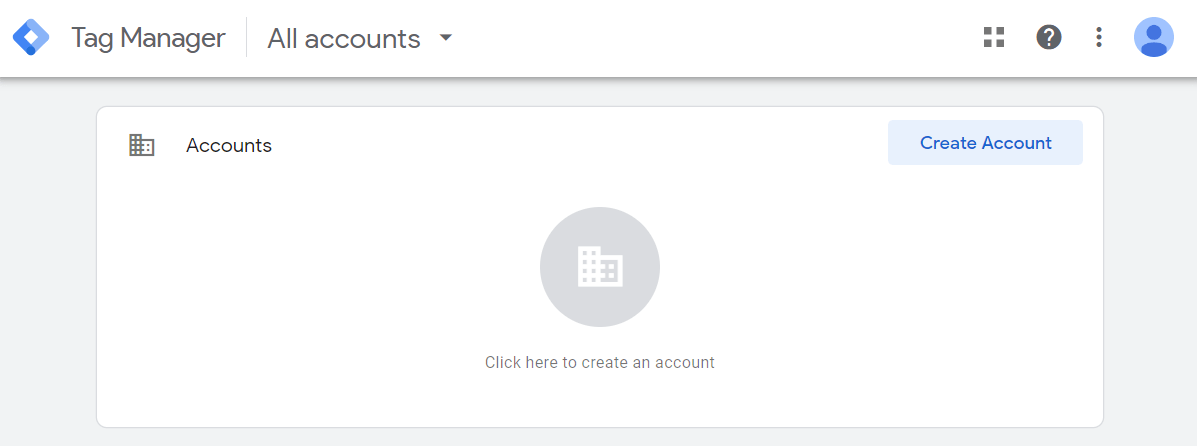
- Sign into Google Tag Manager using your Google Account.
- From the homepage, select the blue “Create Account” button.

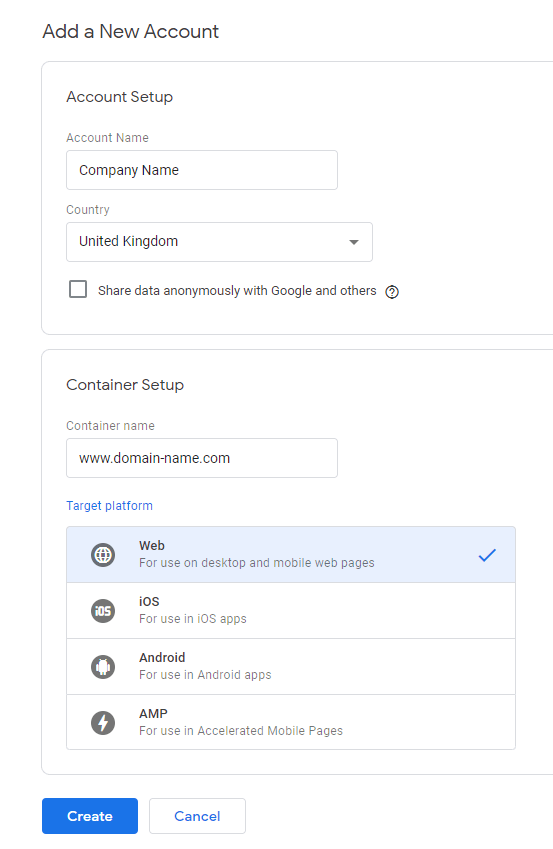
- Enter your account name – usually the name of the company the account is being created for.
- Select the country you’re in.
- Choose whether to share data with Google.
- Enter the name of the container.
- Select your target platform (i.e. where you would like your tags to be deployed) – you can choose from Web pages, iOS apps, Android apps or Accelerated Mobile Pages.
- In this example, we will only be creating one for a website. However, if you are planning to deploy tags to more than one of these platforms, we suggest that you create a new container within the Tag Manager account for each one.
- Click “Create”.
Once you have agreed to Google’s Terms of Service, the next step will be to install Google Tag Manager onto your target platform.
How to install Google Tag Manager onto Your Website
If you’ve only just set up your Tag Manager account; the installation code will pop-up on your screen. If your account was set up a while ago – or you closed this pop-up window – you can re-open it by clicking on the blue code at the top of your screen that says: “GTM-XXXXXXX”.

- Copy and paste the code from the first box into the <head> of every page on your website.
- Copy and paste the code from the second box into the <body> of every page on your website.
Depending on the set up of your site, there may be plugins that allow you to easily install the GTM snippet onto your site without you having to manually edit the source code. Alternatively, you may be able to edit the templates for your site, which can reduce the time needed to install the snippet onto every page. If you’re unsure on how to add code to your website; it is probably best to reach out to a developer.
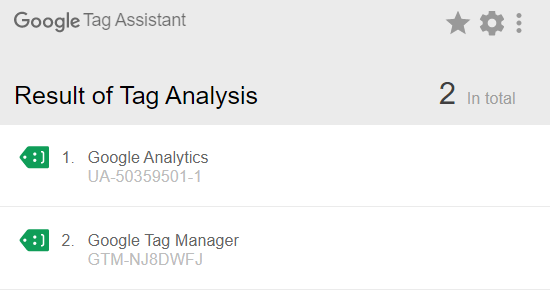
Once you have installed the code onto your website, we recommend testing it by either searching for the GTM-XXXXXXX code (using the inspect tool) or by installing the Tag Assistant plugin and checking if Google Tag Manager is being picked up.
How to grant new users’ access to your Google Tag Manager Accounts and Containers
- From the GTM home page, click on the “cog” icon in the account you are going to grant access to.
- If you are granting access to all containers in the account, then select “User Management” from the Account Column. If you are only granting access to one of the containers in the account, select “User Management” from the Container Column.
- In this scenario, we will be granting access to the whole account. If you are only granting access to one container, skip step 5.
- Click the blue plus (+) symbol in the top righthand corner of the screen and select “Add users”.
- Enter the email address(es) of the user(s) you’re inviting to access the account or container.
- Note: you can only invite email addresses associated with a Google Account.
- Choose whether they will have Administrator or User permissions.
- Under container permissions, select which actions you would like the user to be able to do. We recommend granting “Publish” permissions to anyone who may need to make changes to the container.
- Click the blue “Invitation” button to complete the process.
How does Google Tag Manager Work?
There are 3 main components in Google Tag Manager. These are: Tags, Triggers and Variables.
A tag is fired when the conditions of a trigger are met. A variable is a piece of data that can be used as a trigger condition or as part of the tag configuration.
When being used as a condition for a trigger; a separate value for the variable needs to be set e.g. if the variable is “Page Path”, the value could be “/test-page/”. However, when used in the tag configuration as e.g. the event label; you would only need to input the variable name, and “/test-page/” would be pulled into the tag information when fired.
For example, if I wanted to use Tag Manager to count an event in Google Analytics (every time a user visits a specific page on my website), I would create the following set up:
- Tag – Google Analytics: Universal Analytics
- Variable used in tag – Code for Google Analytics
- Trigger – Page View
- Variable used in trigger – condition that sets specific page path
What type of Tags are there?
There are a variety of different tags available; however, some of the most commonly used are:
- Google Analytics: Universal Analytics – this tag is used to send data to Google Analytics that can be analysed alongside the standard reports provided.
- Google Ads Conversion Tracking – this tag is used to send data to Google Ads when a conversion happens that can’t be recorded through an existing set up.
- Custom HTML – this tag is used to add a piece of custom HTML to a page through the JavaScript integration (that is part of the GTM installation snippet). Because it is implemented through JavaScript, you will not be able to see the custom HTML as part of your source code once it has been added.
What type of triggers are there?
Similar to tags, there are a variety of triggers available. Triggers fire a tag when the trigger action occurs. These actions can include: a page view, a button click, a video view or a variety of custom events.
Triggers are grouped into the following categories:
- Page View:
- Page View – fires when a page on the website begins to load.
- DOM Ready – fires when the Document Object Model is ready to be parsed.
- Window Loaded – fires when the page and any embedded resources has loaded.
- Click:
- All elements – fires when any element on a page is clicked including images, links and buttons.
- Just Links – fires only when a HTML link using the “<a href=” element is clicked.
- User Engagement:
- Element Visibility – fires when a selected element on the page becomes visible.
- Form Submission – fires when a form is submitted.
- Scroll Depth – fires when a user scrolls down a certain percentage of the page.
- YouTube Video – fires based on interactions with an embedded YouTube video on a webpage.
- Other:
- Custom Event – fires when a certain event has happened that has been set up separately in Tag Manager – usually because it can’t be handled by one of the pre-configured triggers.
- History Change – fires when the URL fragment changes or when the HTML history API is used.
- JavaScript Error – fires when a JavaScript error occurs.
- Timer – fires a tag at specifically timed intervals.
- Trigger Group – fires when multiple trigger actions happen.
What Type of Variables are there?
Built-In Variables
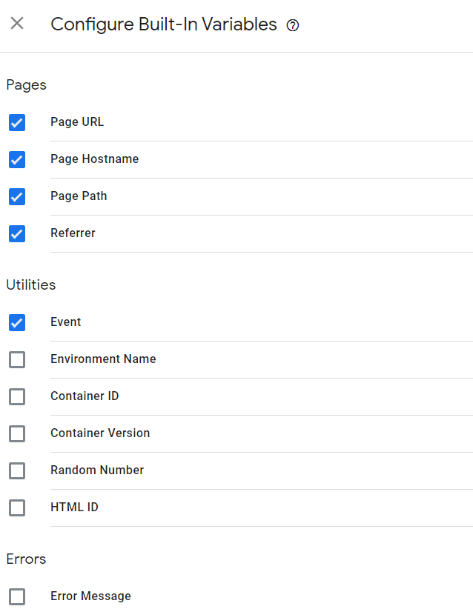
There are a lot of built-in variables that you can activate for your container that cover: page information, utilities, errors, clicks, form information, history, videos, scrolling and visibility. To activate these variables in your container, go to the “Variables” tab and click “Configure” next to Built-In Variables. Check the box next to the ones that you’d like to use and close the window when finished.
User-Defined Variables
User-defined variables are custom variables that you can create to cover criteria that may not be part of the built-in variables. These cover navigation, page variables, page elements, utilities and container data. Some of the most popular user-defined variables include: Custom JavaScript, 1st Party Cookie and DOM Element.
Common Google Tag Manager Tasks
To help get you started, here are some common Google Tag Manager tasks that can help improve your SEO, PPC or social media reporting, as well as your retargeting efforts.
Create a variable for your Google Analytics ID
Creating a Variable for your Google Analytics ID means that you can quickly and easily set up Google Analytics tags and avoid reporting errors due to incorrect GA ID entry.
- Open the Tag Manager container for your website.
- Go the Variables tab.
- Next to “User-Defined Variables” select “New”.
- Click the pencil icon next to “Variable Configuration” and select “Google Analytics settings”.
- Open the Google Analytics account for your website.
- Go to Admin.
- In the property column select “Tracking Info” and open the “Tracking Code”.
- Copy the code under “Tracking ID” – it will look like “UA-XXXXXXXXX-X”.
- Go back to Tag Manager.
- Paste the code into the box that says, “Tracking ID”.
- Name your Variable.
- Click the blue “Save” button.
How to track an event in Google Analytics using Google Tag Manager
A common use for Tag Manager is to help measure performance by tracking events – such as goal conversions – in Google Analytics when it wouldn’t be suitable to track a destination URL, time on the site, or the number of pages per visit.
One of the most common events that is used as a “goal” is a form submission that doesn’t take the user to a thank you page. When this occurs, we would do the following:
- Open the container for your website.
- Create a new tag.
- Select “Google Analytics: Universal Analytics” as the tag type.
- Change the Track Type to “Event”.
- Complete at least one of the Event Tracking Parameters – this is how Google Analytics will link your goal to the event later.
- Under Google Analytics Settings, select your Google Analytics ID Variable.
- Click the grey circle under “Triggering”.
- If your trigger is not set up yet, click the blue cross in the top righthand corner. (If your trigger is already set up, select it from the list and skip steps 9-14).
- Click on the pencil icon next to Trigger Configuration.
- Choose how your event will be triggered. For our example, we will be using a form submission trigger, but any of the available triggers may be suitable depending on your event.
- Select whether your trigger will fire on all form submissions across the site or only on some forms.
- If your event is only going to count some forms, you will need to use variables to establish what conditions need to be met for the trigger to be fired. If the variable you want to use is not already in the dropdown, you can either select “Choose Built-In Variable” or “New Variable” to create a new one.
- Once you have chosen the variable, you will need to enter a value to filter by e.g. we will choose to only trigger this tag when a form is submitted and when the page path is “/test-page”.
- Enter a name for your trigger e.g. “Test Page Form Submission Trigger” and press Save.
- Enter a name for your tag e.g. “Test Page Form Submission Tag” and press Save.
- Your tag has now been created – you can now preview and submit your changes to make them live.
- In Google Analytics, go back to your Admin tab and select “Goals” in the Views column.
- Create a new goal.
- Under goal set up, select “Custom” and press continue.
- Name your goal e.g. “Test Page Form Submissions”.
- Under type, select “Event” and press continue.
- Enter the same values into your event conditions as you’ve entered into your tags Event Tracking Parameters. Make sure to match the values exactly, as the event won’t be picked up as a goal if there are any errors.
- Save your goal.

How to track a conversion in Google Ads using Google Tag Manager
Some conversions from ads can be automatically recorded in Google Ads or imported from Google Analytics. However, there may be occasions where you’ll need to use Tag Manager to help you track and record conversions in Google Ads.
- Configure your conversion in Google Ads.
- In Tag set up, select “Use Google Tag Manager” to access your Conversion ID and Conversion label.
- Open your Tag Manager container.
- Ensure your Conversion Linker Tag is set up. If you have already got an active Conversion Linker Tag, skip steps 5-8.
- Create a new tag.
- Click the pencil icon next to Tag Configuration and select “Conversion Linker”.
- Click the pencil icon next to Triggering and select the default Page View trigger “All Pages”.
- Name your Conversion Linker Tag and save it.
- Create a new tag.
- Click the pencil icon next to Tag Configuration and select “Google Ads Conversion Tracking”.
- Copy the Conversion ID and Conversion Label from the Google Ads page and paste into the relevant boxes in the tag.
- Complete any additional tag information using Variables.
- Click the grey circle under Triggering.
- The trigger settings will depend on the conversion you’re trying to track. For this example, we will track form submissions on a specific page.
- Select whether your trigger will fire on all form submissions across the site or only on some forms.
- If your event is only going to count some forms, you will need to use variables to establish what conditions need to be met for the trigger to be fired. If the variable you want to use is not already in the dropdown, you can either select “Choose Built-In Variable” or “New Variable” to create a new one.
- Once you’ve chosen the variable, you will need to enter a value to filter by e.g. we will choose to only trigger this tag when a form is submitted and when the page path is “/test-page”.
- Enter a name for your trigger e.g. “Test Page Form Conversions Trigger” and press Save.
- Name your tag and press Save.
- You can now preview and submit the tags you have created in the container.
How to add a Pixel to your website using Google Tag Manager
If you’re looking to re-target users on social media, or simply gather information about how users interact with your brand on other platforms; you will probably need to install a pixel on your website.
Rather than manually editing the code of your website, you can use Tag Manager to easily install the pixel snippet.
- Copy the pixel code from the platform you’re using.
- Open your Tag Manager container.
- Create a new tag.
- Select the pencil icon next to “Tag Configuration” and select “Custom HTML”.
- Paste the pixel code into the HTML box provided.
- Click the pencil icon next to Triggering and select a “Page View” trigger. Depending on how you’re using this pixel, you may want to fire it on all page views or only on some page views.
- If you’re only using the pixel for some page views, use variables to define exactly when the pixel tag is fired.
- If the variable you want to use is not already in the dropdown, you can either select “Choose Built-In Variable” or “New Variable” to create a new one.
- Once you have chosen the variable, you will need to enter a value to filter by e.g. we will choose to only trigger this tag when the page path is “/test-page”.
- If you’re only using the pixel for some page views, use variables to define exactly when the pixel tag is fired.
- Name your tag and press Save.
- You can now preview and submit your pixel tag.
There are a wide range of uses for Google Tag Manager, but this is a good place for you to start as a beginner. If you have got any more questions about how to use Google Tag Manager to improve your performance tracking and retargeting abilities, feel free to get in touch with our team.
For more advanced Google Tag Manager tips, check out Simo Ahava’s GTM Tricks